How To Use Layout Templates To Easily Make Seamless Patterns
Step 1: Import your template
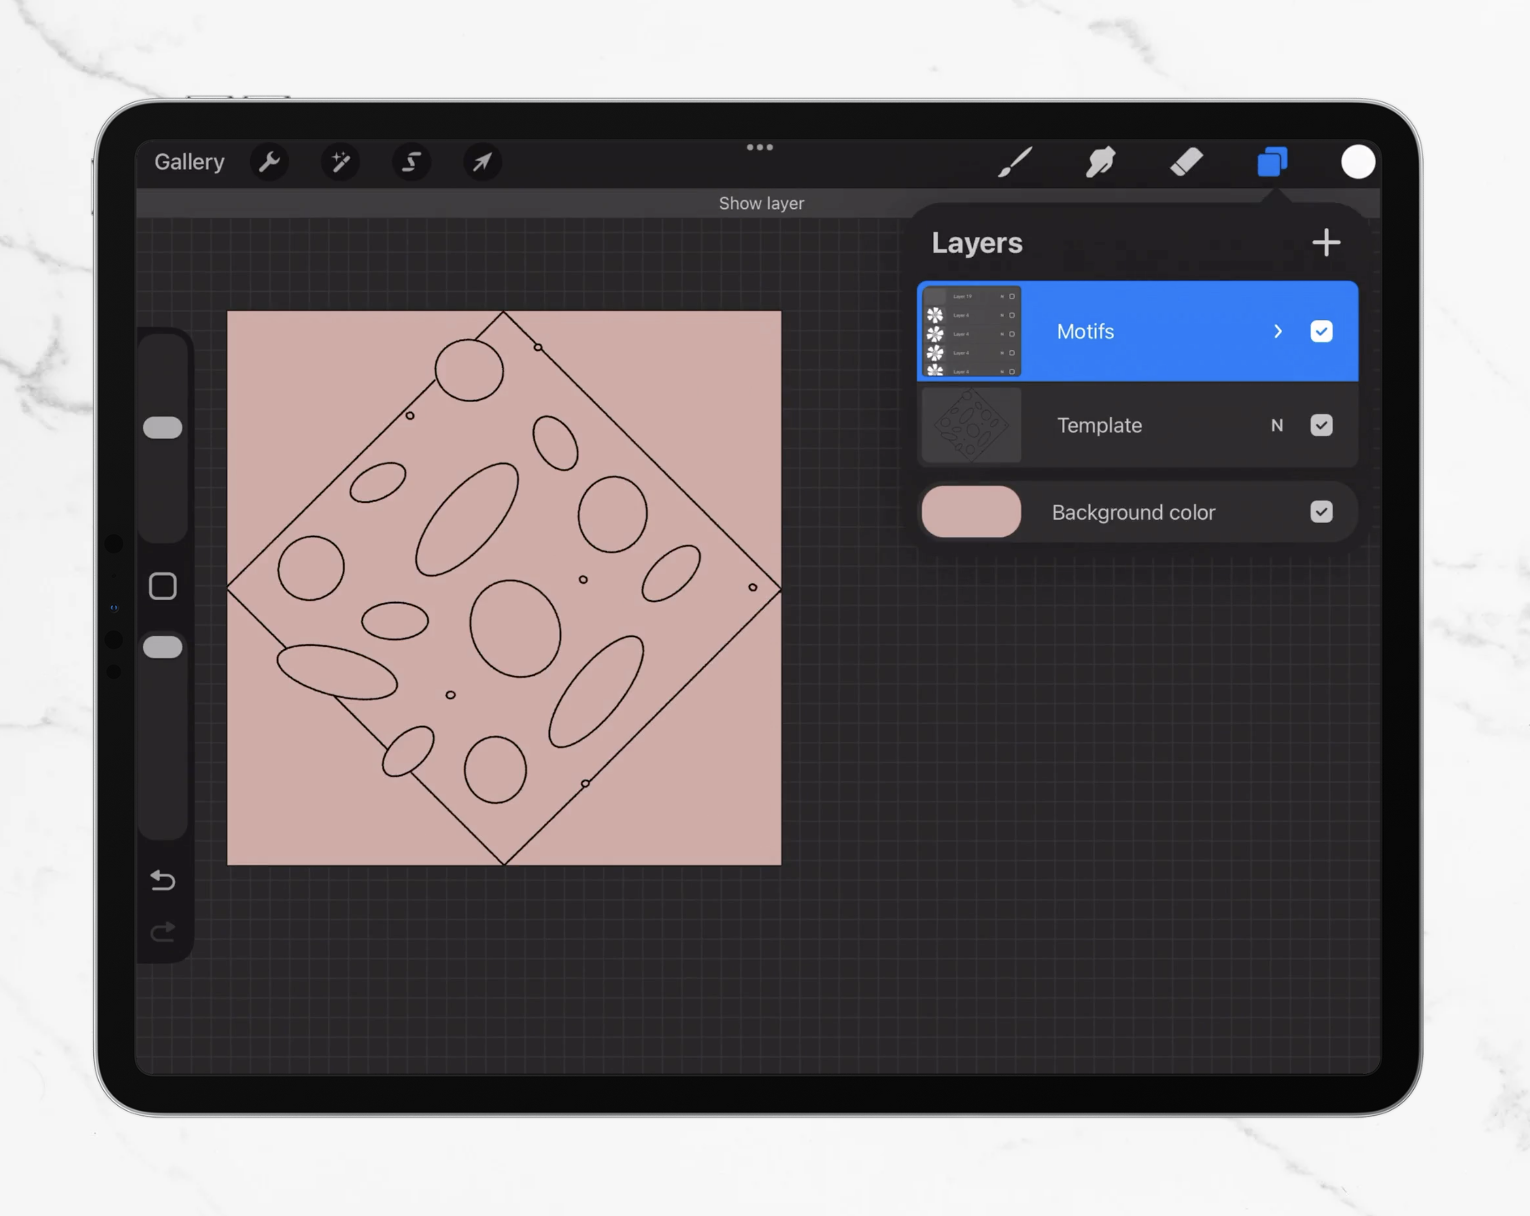
Import your layout template into Procreate.
Make sure the template layer fits edge to edge in the canvas. If it doesn’t, select the template layer, tap the selection tool, and tap Fit To Canvas.
I recommend locking your template layer so you don’t accidentally draw on it (been there, done that).

Step 2: Place or draw your motifs inside the center diamond
Add or draw in your motifs to the circles and ovals in the template. Vary the direction of your motifs if you want a pattern that is non-directional (ideal for fabric). Keep everything fully inside the center diamond, and don’t worry about the corners yet. At this stage, you’re just building a nice, balanced cluster of motifs in the middle.
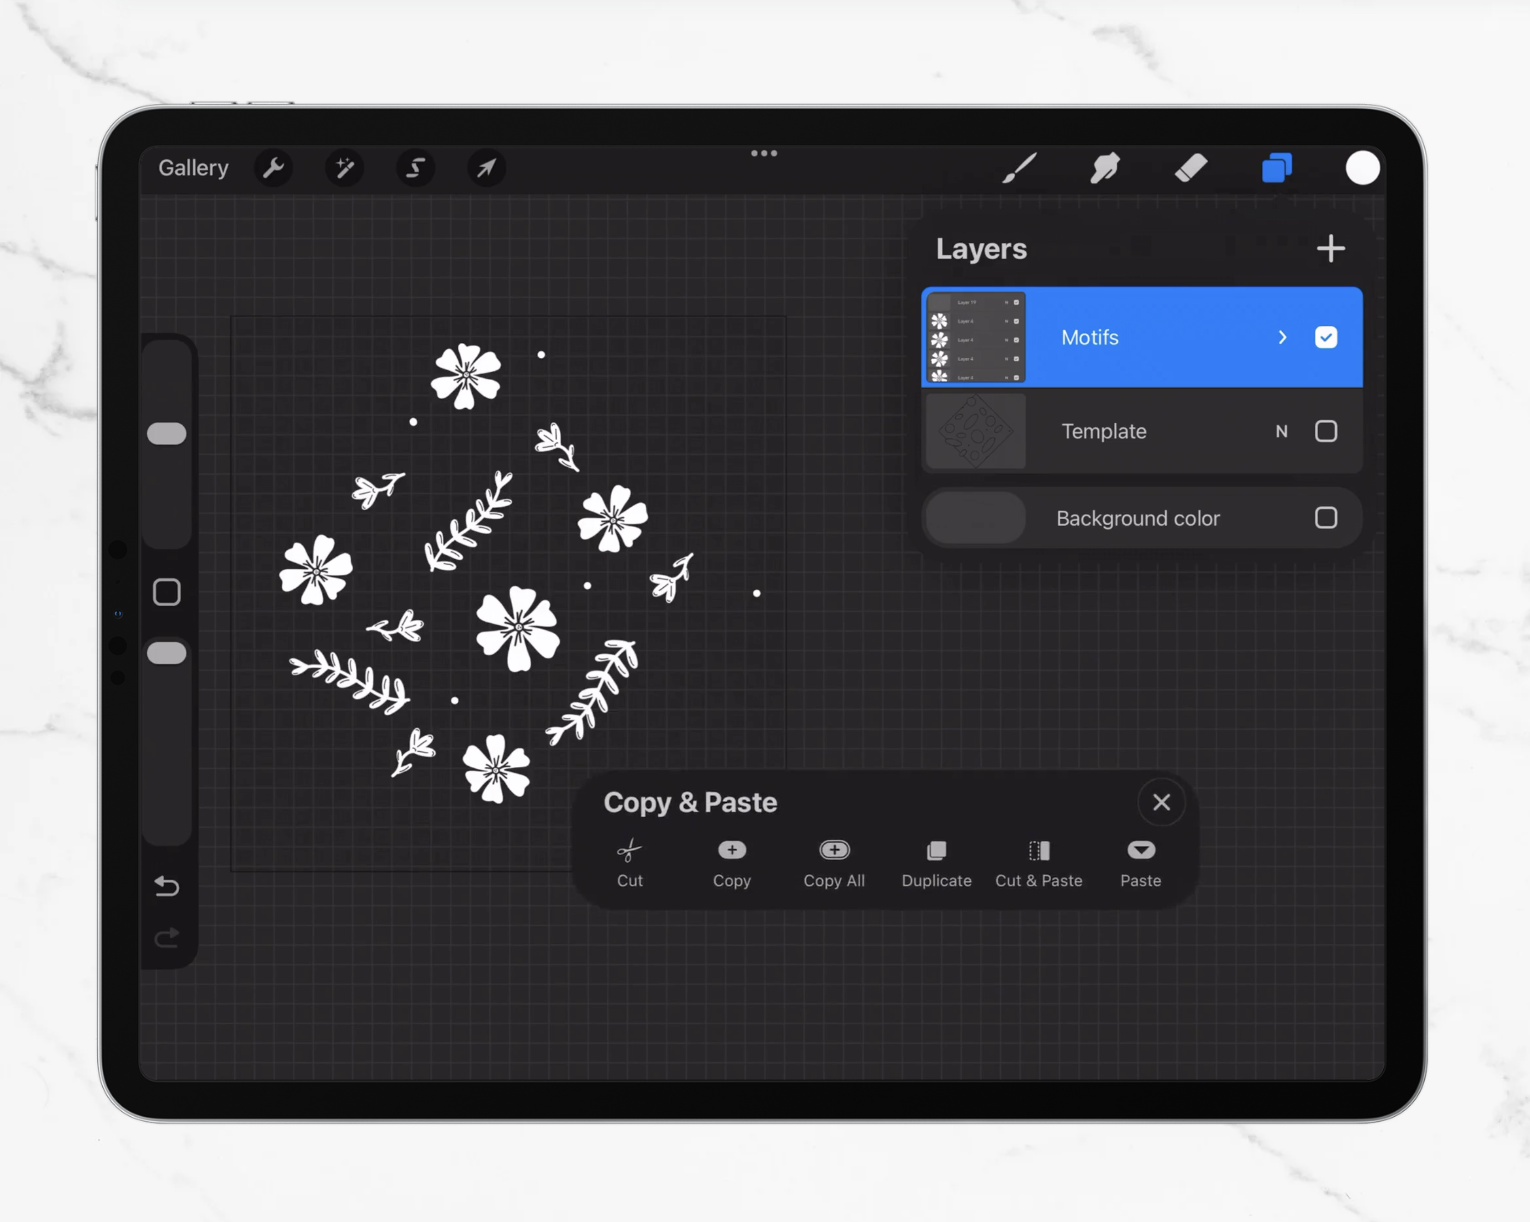
Step 3: Copy your art
Once you’re happy with the center:
Turn off your background color
Turn off the template layer
Turn off sketches and anything else you don’t want in the final tile.
Use a three-finger swipe down to bring up Procreate’s Copy & Paste menu.
Tap Copy All.
This copies everything visible on your canvas.

Step 4: Paste your copied art
With the same three-finger swipe, open the menu again and tap Paste.
Procreate will create a new layer with the pasted content above your current layer.
You should now have:
your original motif layer
a new pasted layer that includes your motifs
We’re going to use this pasted layer to create the four corners of the repeat.

Step 5: Mark two opposite corners for alignment
On your pasted layer:
Choose a simple brush and color (something visible but not huge).
Make a small dot or line in the crease of two opposite corners of the diamond template (for example: top left and bottom right corners).
You will probably notice that your pasted art layer does not automatically fill the canvas. This is a problem because you cannot align properly with a partially filled canvas. Making these marks will make the entire layer “full”, and allow you to line everything up when you move the layers off the canvas. If you skip this step, you will have alignment problems in the next step.
Tip: Keep these marks small and right oin the corners so they’re easy to erase later.
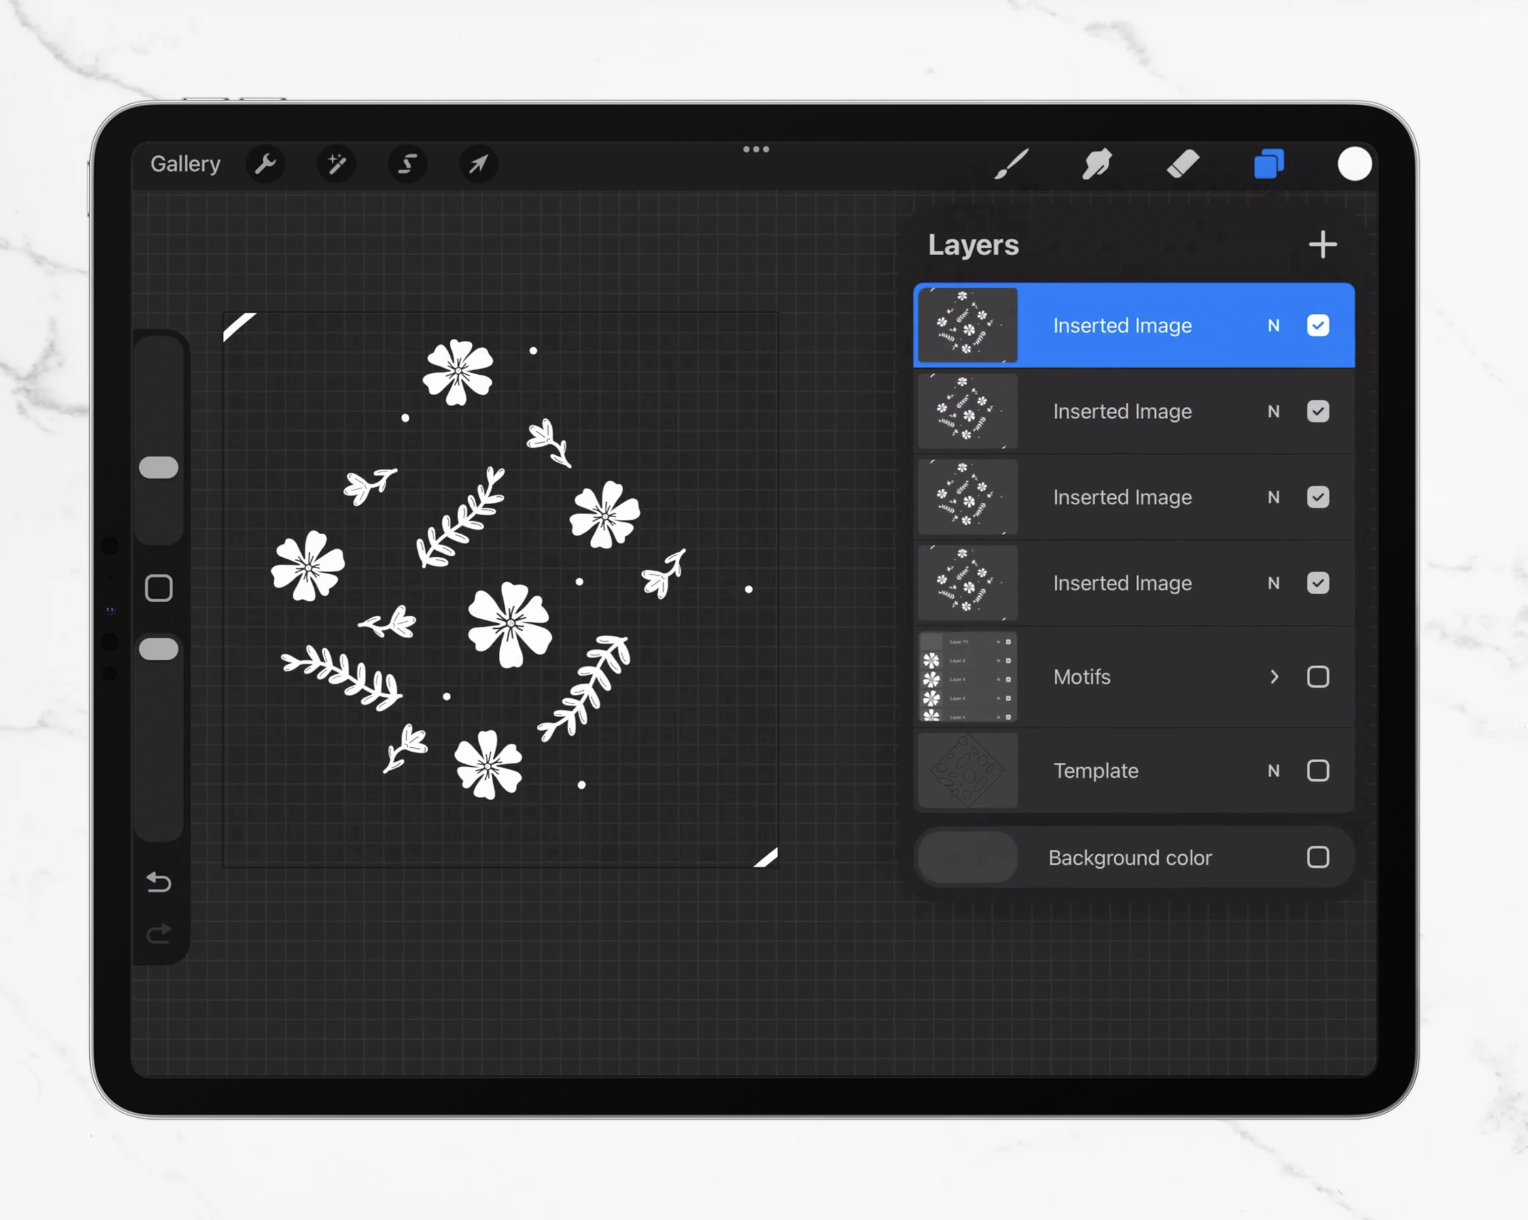
Step 6: Duplicate that layer three more times
In the Layers panel:
Swipe left on your marked pasted layer and tap Duplicate.
Do this until you have four identical copies of that layer.
You now have four marked copies that will become your four repeating corners.
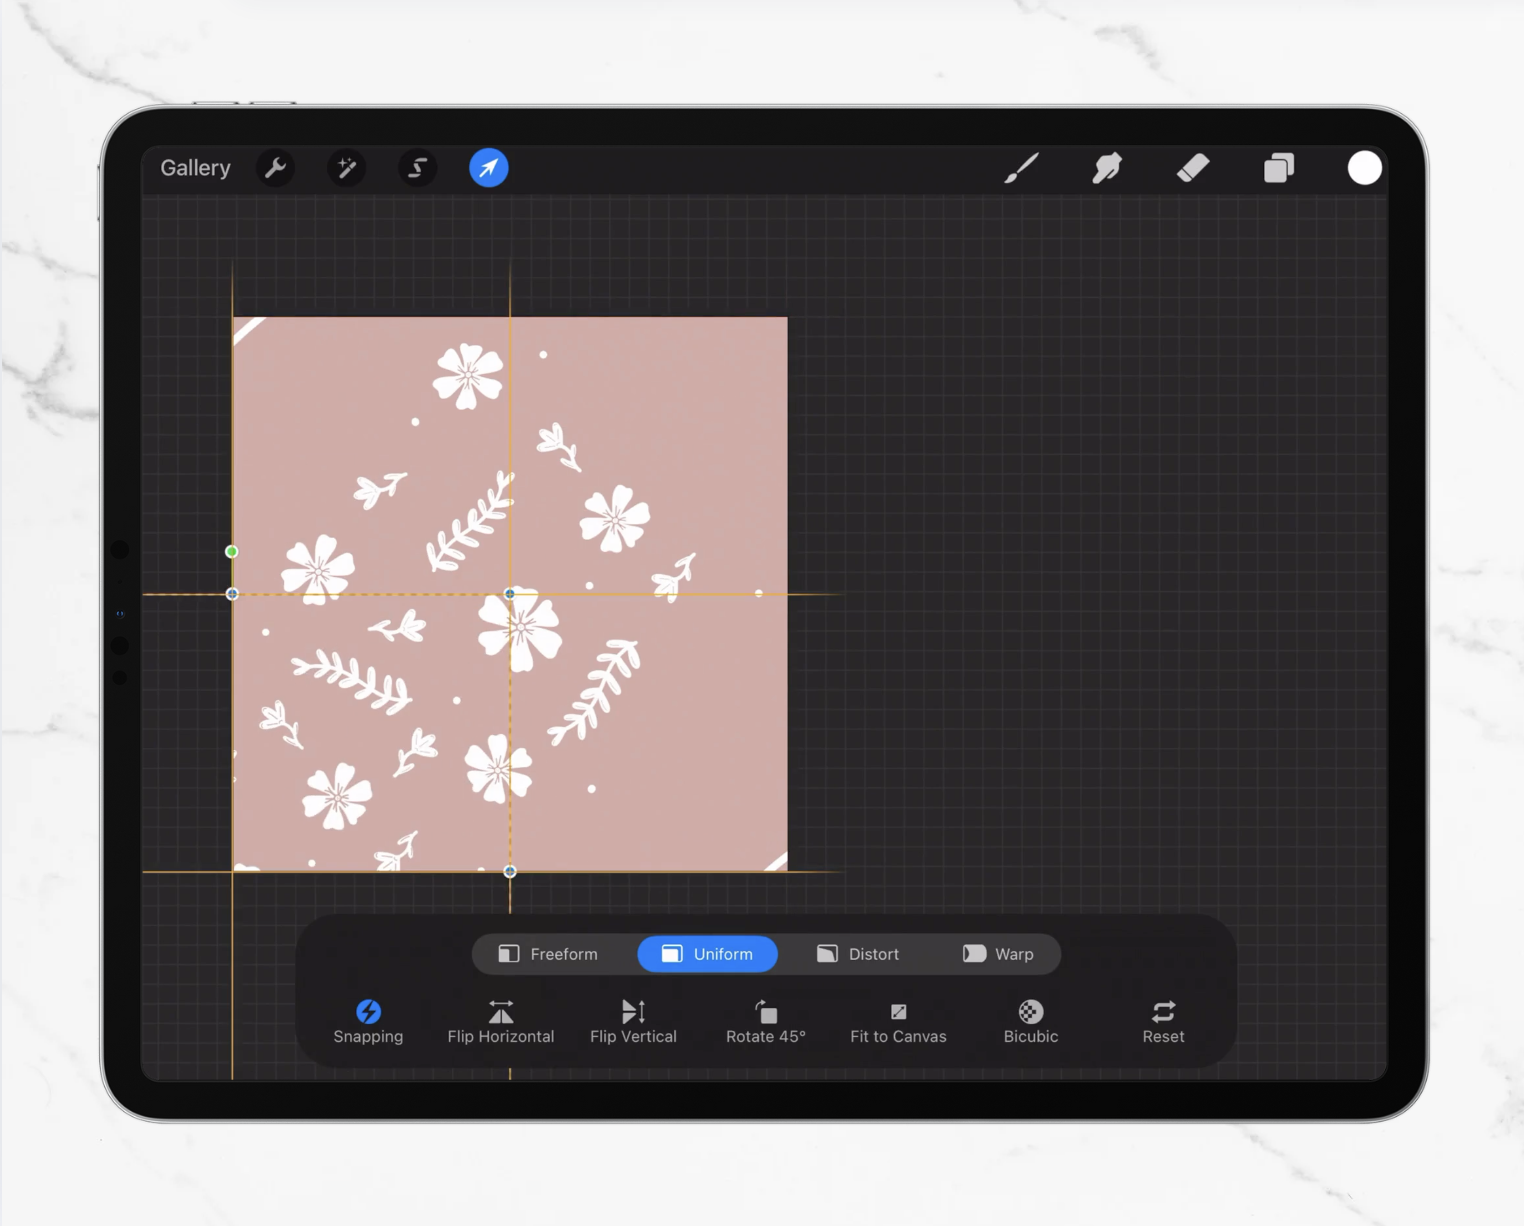
Step 7: Slide each copied layer into a different corner
Turn off your main artwork layer(s).
Then, working one layer at a time, starting with the bottom copy layer:
Drag the first copied layer diagonally until its marked corner lines up exactly with the matching corner of the canvas. When your canvas is perfectly aligned, the golden crosshairs will appear.
For example as shown, slide the layer down and out to the left until it sits in the bottom left corner of the artboard.
Repeat this for each of the remaining three layers, placing them in the four corners (top, right, bottom, left).
You should now see your motifs repeated perfectly in each corner outside the center.
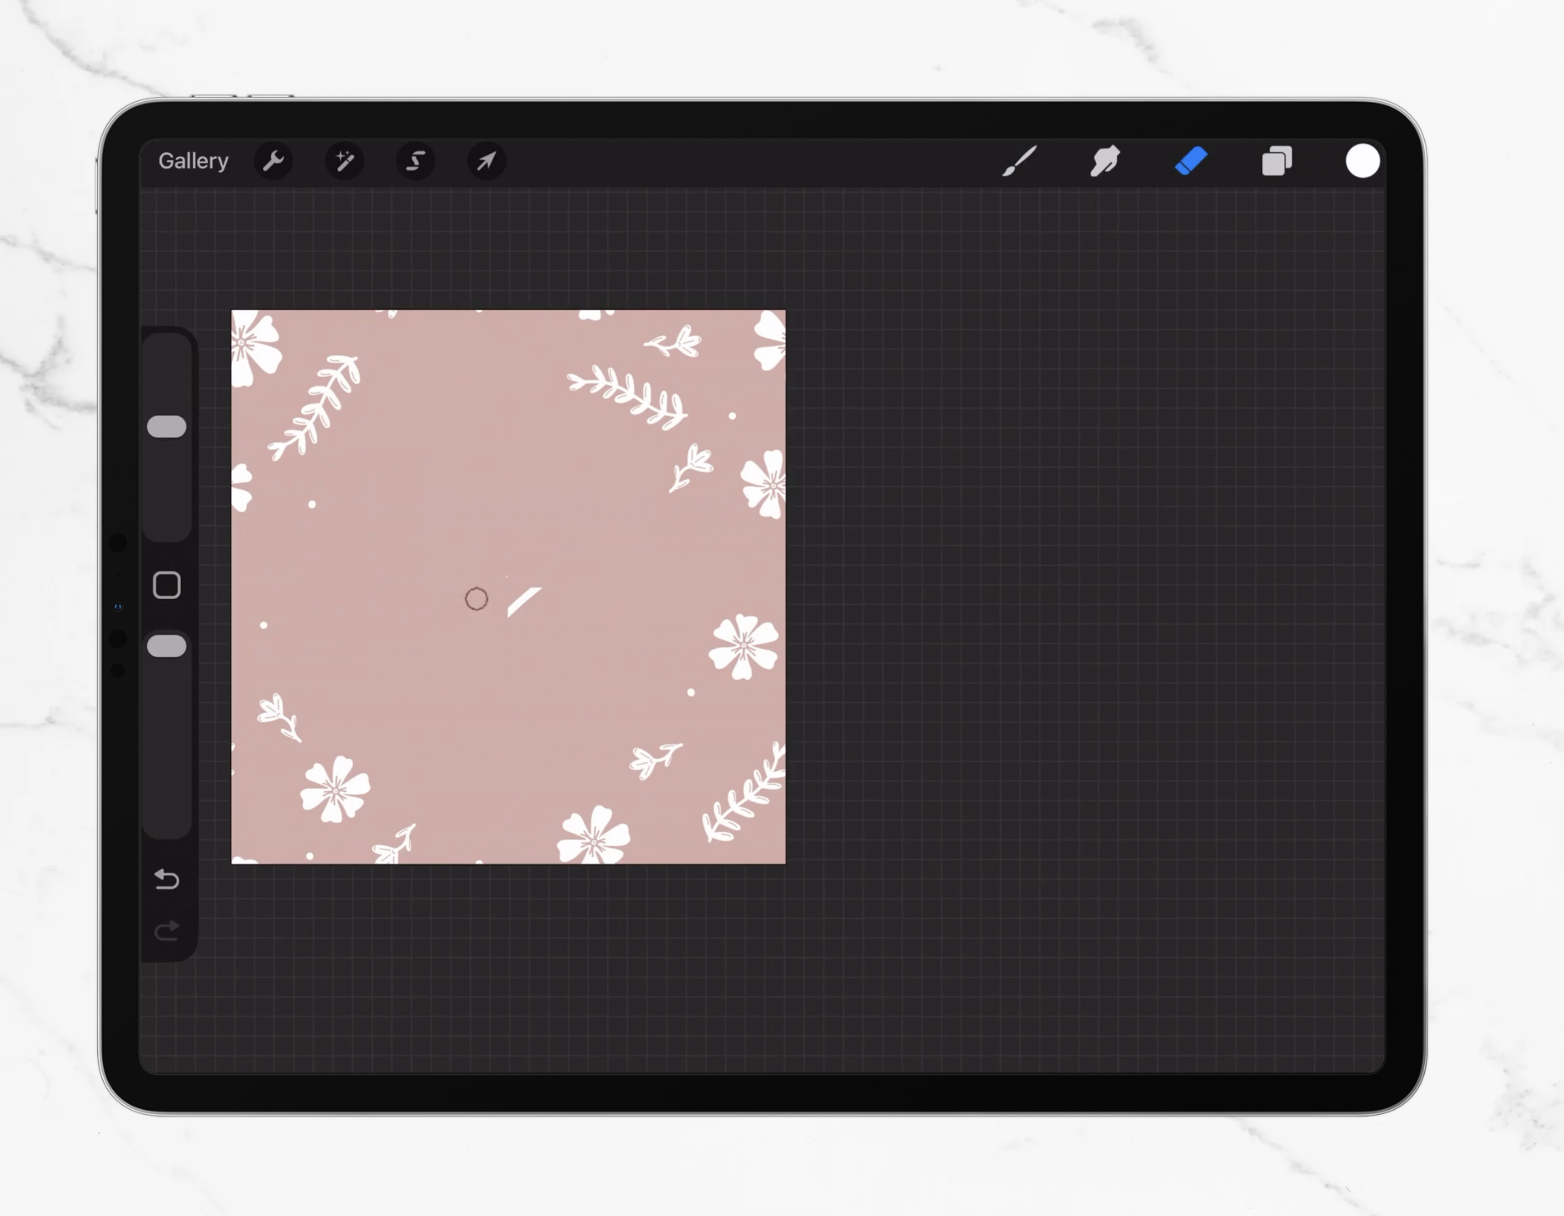
Step 8: Merge and erase the corner marks
Once everything is lined up neatly:
In the Layers panel, merge the four corner layers.
Zoom into the center where the corner copies overlap and erase the little corner marks you drew earlier.
Turn back on your original artwork layer.
Now you should have:
merged “border/corners” layer
original “center” layer(s)
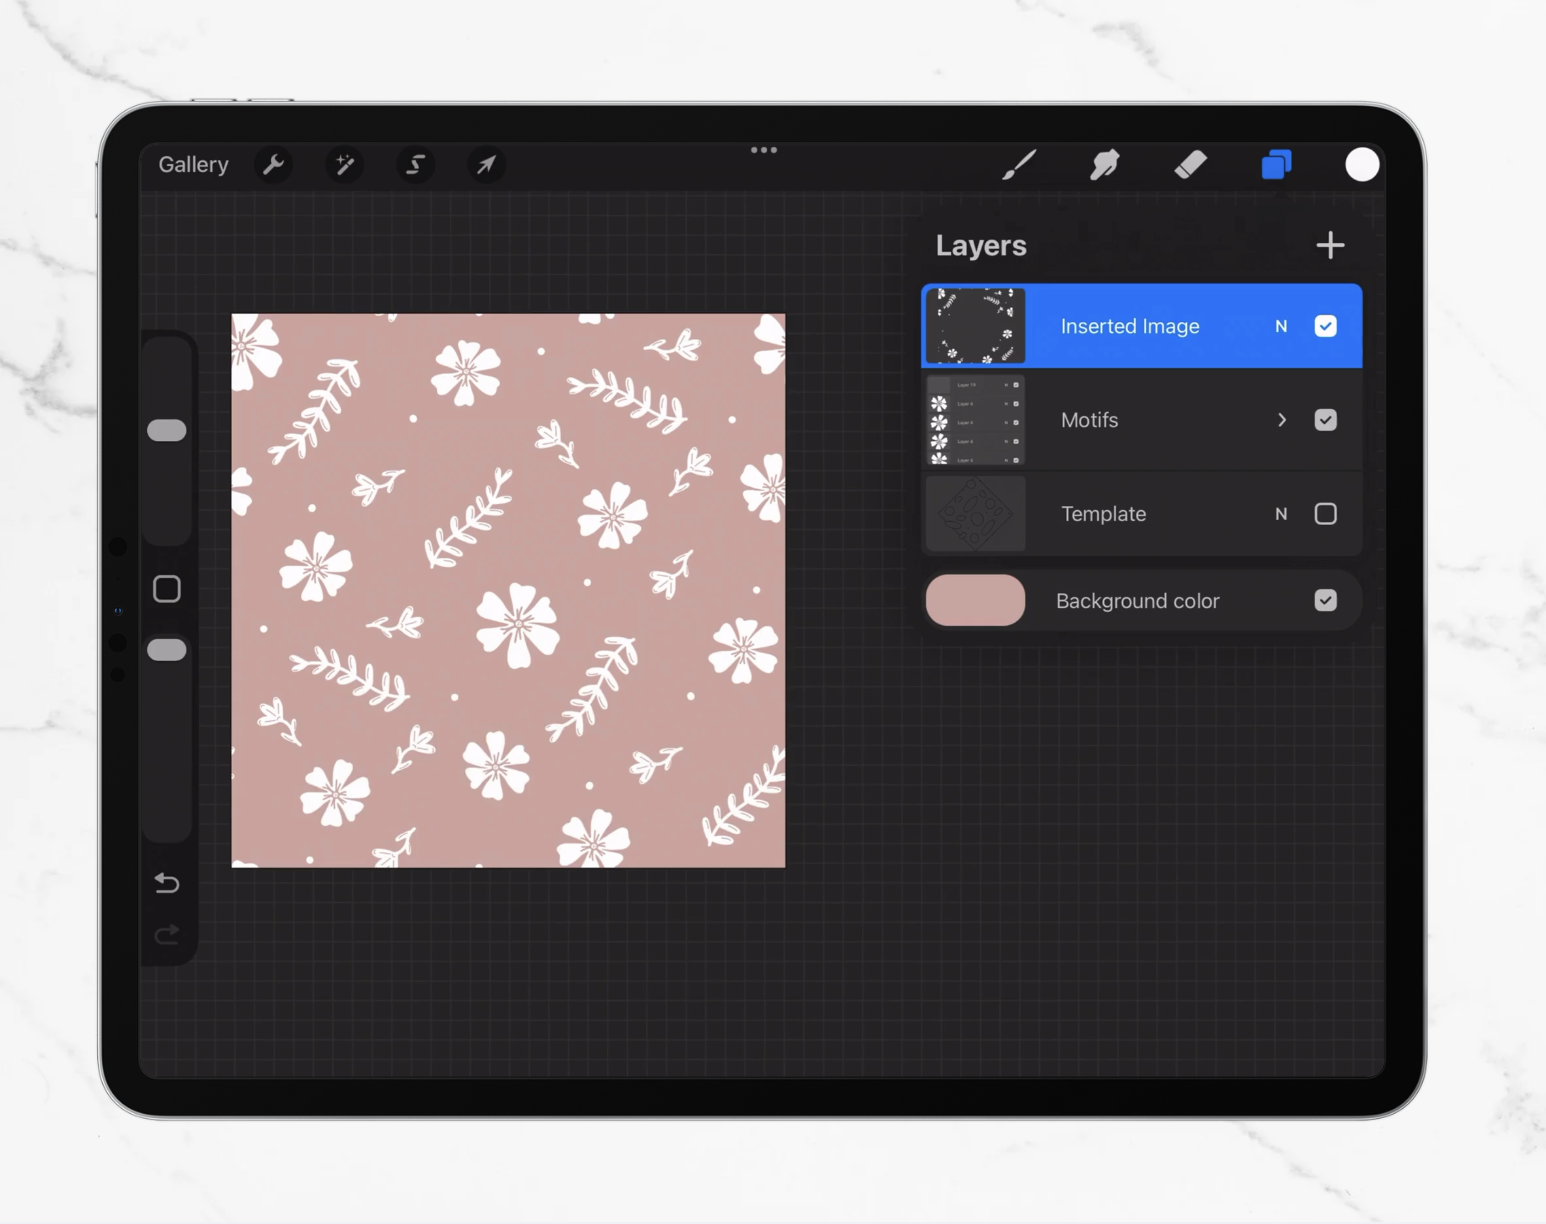
Congrats! You have your 1x1 tile!
At this point, your tile can be done, or you can add extra little details throughout if you’d like, but avoid placing anything that touches the outer edges now - the edges are already “set.”
Since all your motifs are on a transparent background, you can also change the background color if you wish.
If you’d like to eventually change the color of your motifs, you can go back and create another copy of your main artwork layers using step 3/4 which you can then merge with your border/corners layer.
Once you walk through the diamond method a couple of times, it’ll start to feel really intuitive and easy. The great thing is about using a template for placement is that you can skip the guesswork of placement, and focus on the fun part: drawing your motifs.
If you’re a beginner, templates can also help you get a better understanding of how to arrange motifs so that they flow. If you’re a seasoned designer, templates can speed up your workflow dramatically.
Ready to get started with a template?
Choose from my growing library of pattern templates, or pick up a bundle and get to easily designing a full collection with templates.